Googleマップウィジェットを使用するには、まずAPIキーを作成する必要があります。また、課金アカウントとMaps Embed APIを有効にしたプロジェクトが必要です。完了したら、「Elementor」>「設定」> 「連携タブ」に移動して、キーを入力します。詳しくは、GoogleのSet up Cloud Consoleの記事をご覧ください。
目次
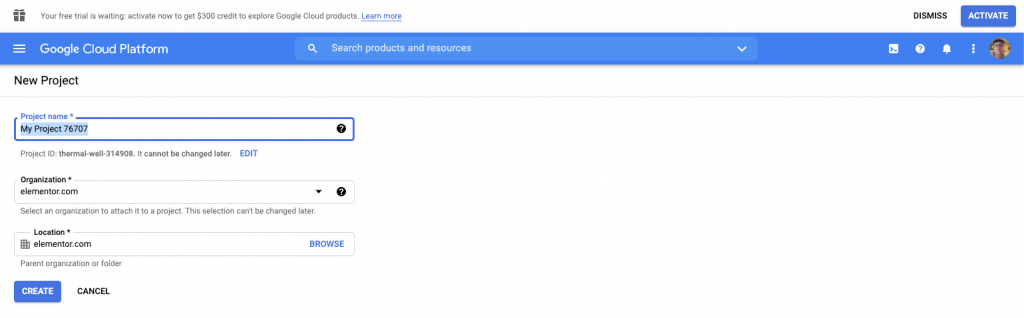
Google Cloud Platformから「Create New project」を作成します。
![Elementer - GoogleMap - New-Project-API](https://estival.jp/wp-content/uploads/Elementer-GoogleMap-New-Project-API.png)
- プロジェクトに名前を付けます。(注:後で変更することはできません)
- 組織名を入力します。
- プロジェクトの場所を入力します。
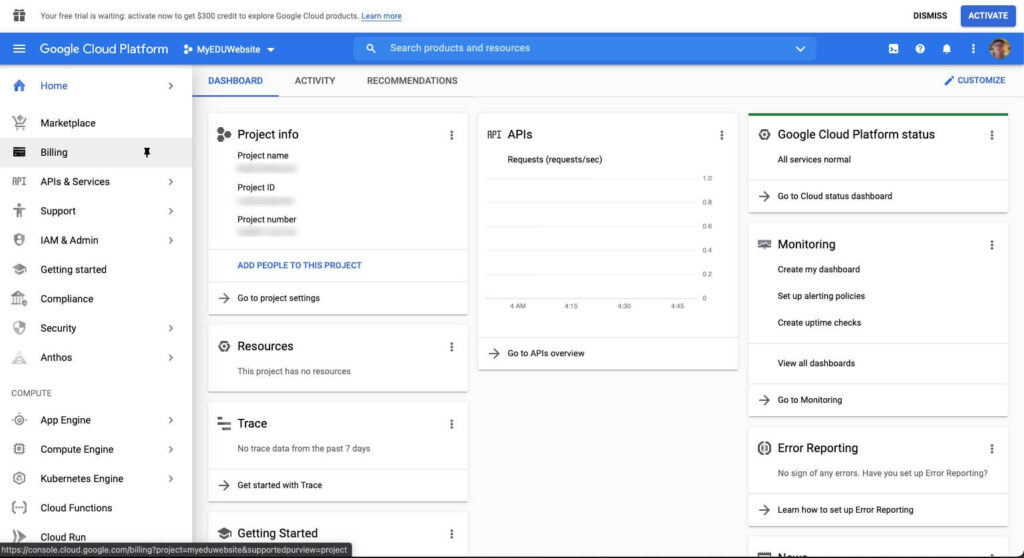
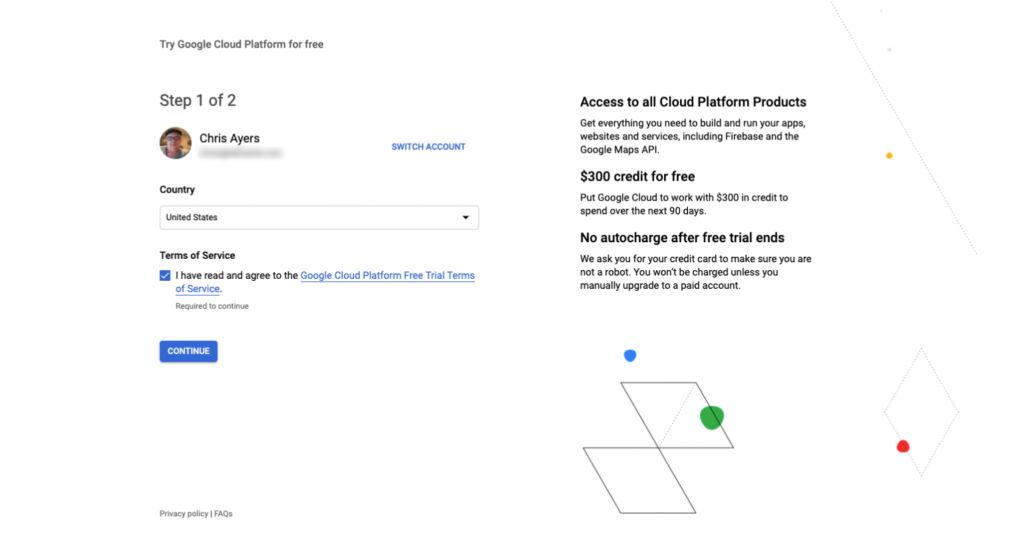
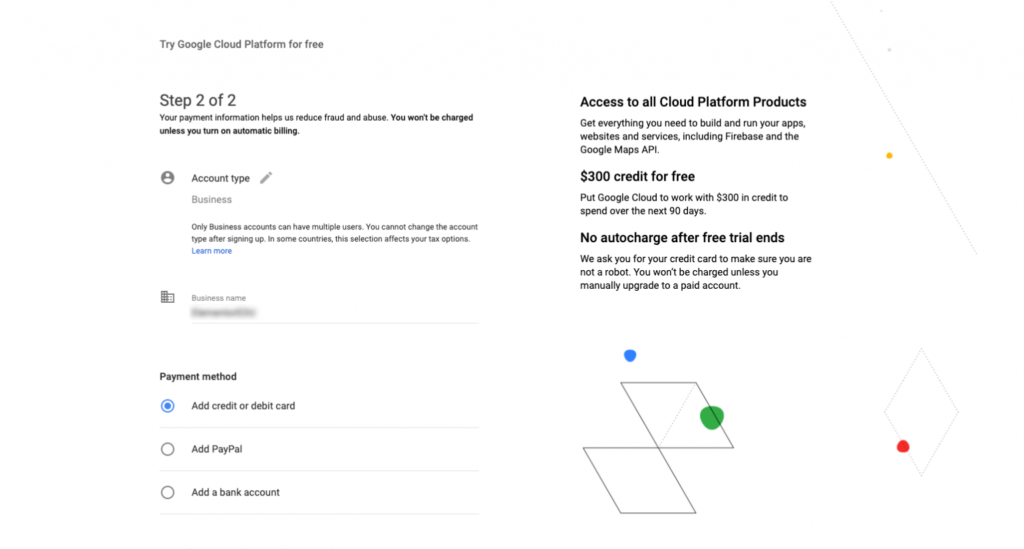
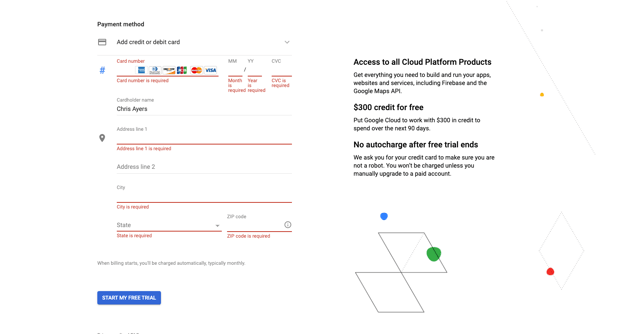
次に、プロジェクトの請求情報を設定します。「左メニュー」>「Billing」から行います。
![elementor - googlemap - billing](https://estival.jp/wp-content/uploads/elementor-googlemap-billing-1024x558.jpeg)
![elementor - googlemap - billingOne](https://estival.jp/wp-content/uploads/elementor-googlemap-billingOne-1024x549.png)
- プロジェクトに該当する国を選択してください。
- サービス利用規約に同意します。
- 「Continue」をクリックします。
![elementor - googlemap - billingTwo](https://estival.jp/wp-content/uploads/elementor-googlemap-billingTwo-1024x549.png)
- アカウントの種類を選択します。
- ビジネスネームを入力します。
- お支払い方法を選択します。
- 上記で選択したお支払い情報(例:クレジットカード)を入力してください。
![elementor - googlemap - billingTwo - payment-Info](https://estival.jp/wp-content/uploads/elementor-googlemap-billingTwo-payment-Info.png)
- 「START MY FREE TRIAL」をクリックします。
これで、このプロジェクトのための請求書情報が完成しました。
- 「APIs & Services」>「Credentials」タブで、「+CREATE CREDENTIALS」をクリックし、「API key」を選択します。
![elementor - googlemap - creatingCredentials1](https://estival.jp/wp-content/uploads/elementor-googlemap-creatingCredentials1-1024x528.png)
- APIキーが発行されます。保護のため、このキーは他の場所では使用しないことをお勧めします。
![elementor - googlemap - creatingCredentials2](https://estival.jp/wp-content/uploads/elementor-googlemap-creatingCredentials2.png)
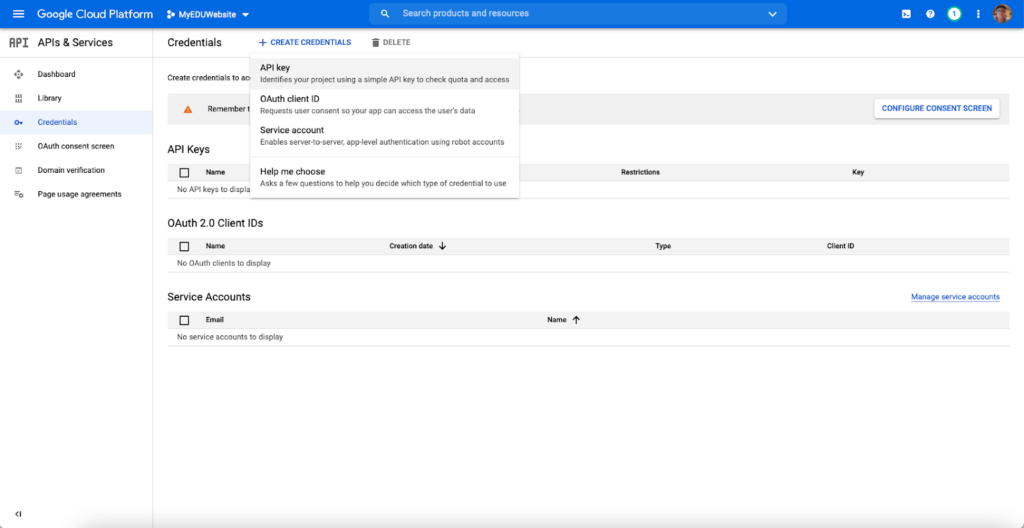
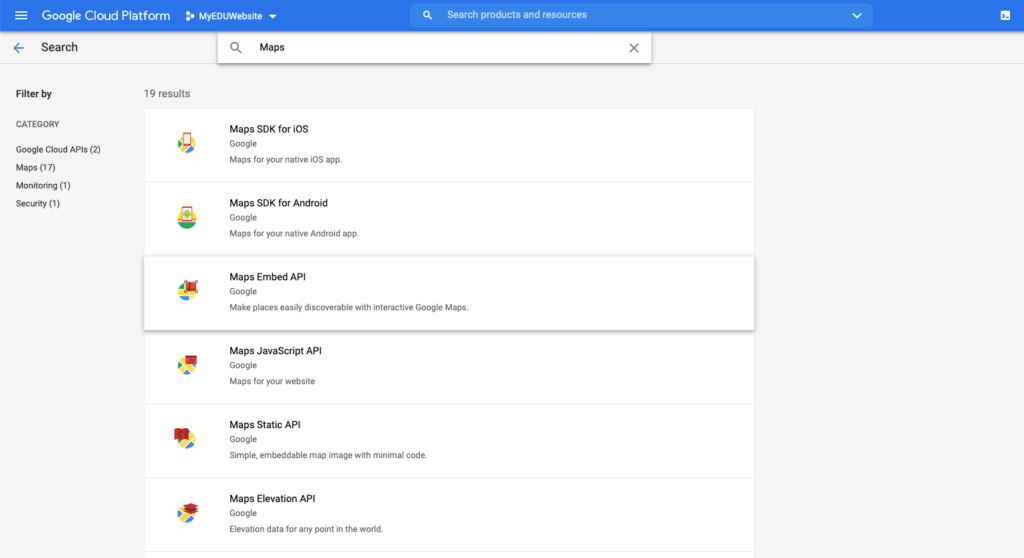
キーを使って使用するアプリケーションを関連付けることができるようになりました。「APIs & Services」>「Dashboard」>「Library」をクリックします。
![elementor - googlemap - addingApplications](https://estival.jp/wp-content/uploads/elementor-googlemap-addingApplications-1024x529.png)
- 検索ボックスに「Maps」と入力します。Elementorウィジェットには、「Maps Embed API」が必要です。リストから「Maps Embed API」を選択してください。
![elementor - googlemap - addingApplications - addingMapsEmbedAPI1](https://estival.jp/wp-content/uploads/elementor-googlemap-addingApplications-addingMapsEmbedAPI1-1024x558.png)
- 「Maps JavaScript APIを有効にする」ボタンをクリックします。
![elementor - googlemap - addingApplications - addingMapsEmbedAPI2](https://estival.jp/wp-content/uploads/elementor-googlemap-addingApplications-addingMapsEmbedAPI2-1024x528.png)
- 以上で、利用可能なAPIのリストに表示され、データの収集が開始されます。
![elementor - googlemap - addingApplications - addingMapsEmbedAPI3](https://estival.jp/wp-content/uploads/elementor-googlemap-addingApplications-addingMapsEmbedAPI3.png)
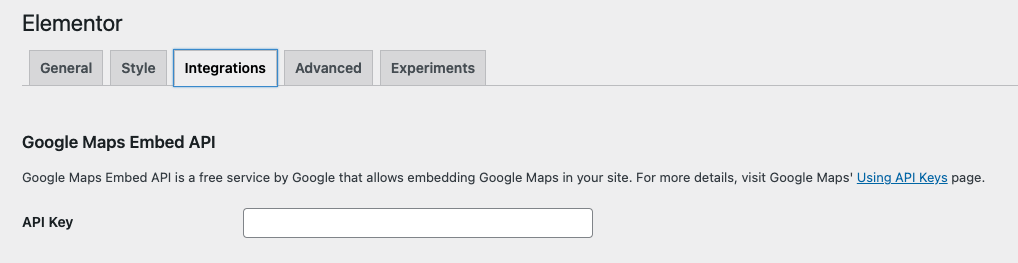
「Elementor」>「設定」> 「連携タブ」に移動して、Googleマップウィジェットを使用するためのAPIキーを設定してください。
![elementor - googlemap - addingApplications - addyourAPIkeytoelemntor](https://estival.jp/wp-content/uploads/elementor-googlemap-addingApplications-addyourAPIkeytoelemntor.png)
公式ページ:Google Maps Integration